

Camera calibration process using Radiant Metrics service
It's easier than you think

In this blog, we will explore the process of camera calibration, its nuances, and the steps required to achieve the best results. Materials obtained from a calibrated camera contain minimal optical distortions and allow for accurate image representation.
A properly calibrated camera can be used, for instance, to optimize software operations that rely on precise data processing and fully utilize machine vision capabilities. For example, this is crucial in detecting defective products on a production line, where even slight deviations of a few millimeters are unacceptable.
Stay tuned for our upcoming article, "The Modern World Through the Eyes of Machines."
Project Setup
Data collection for calibration is organized through a step-by-step wizard, making the process accessible to both experienced users and beginners. By following this guide and using our videos and screenshots, you can calibrate your camera independently and enhance your shooting results.
The process begins with creating a project. Open the projects page and create a new one by clicking the “Plus” button. When naming the project, it’s helpful to specify the camera model or the project creation date. This is especially useful if you end up managing multiple projects.
In the comments section, you can provide detailed camera settings, specify objectives, and describe shooting conditions (e.g., lighting, distance to the screen, etc.). Based on our experience, this information can help reproduce the same conditions for consistent quality results or identify factors to avoid mistakes in the future.
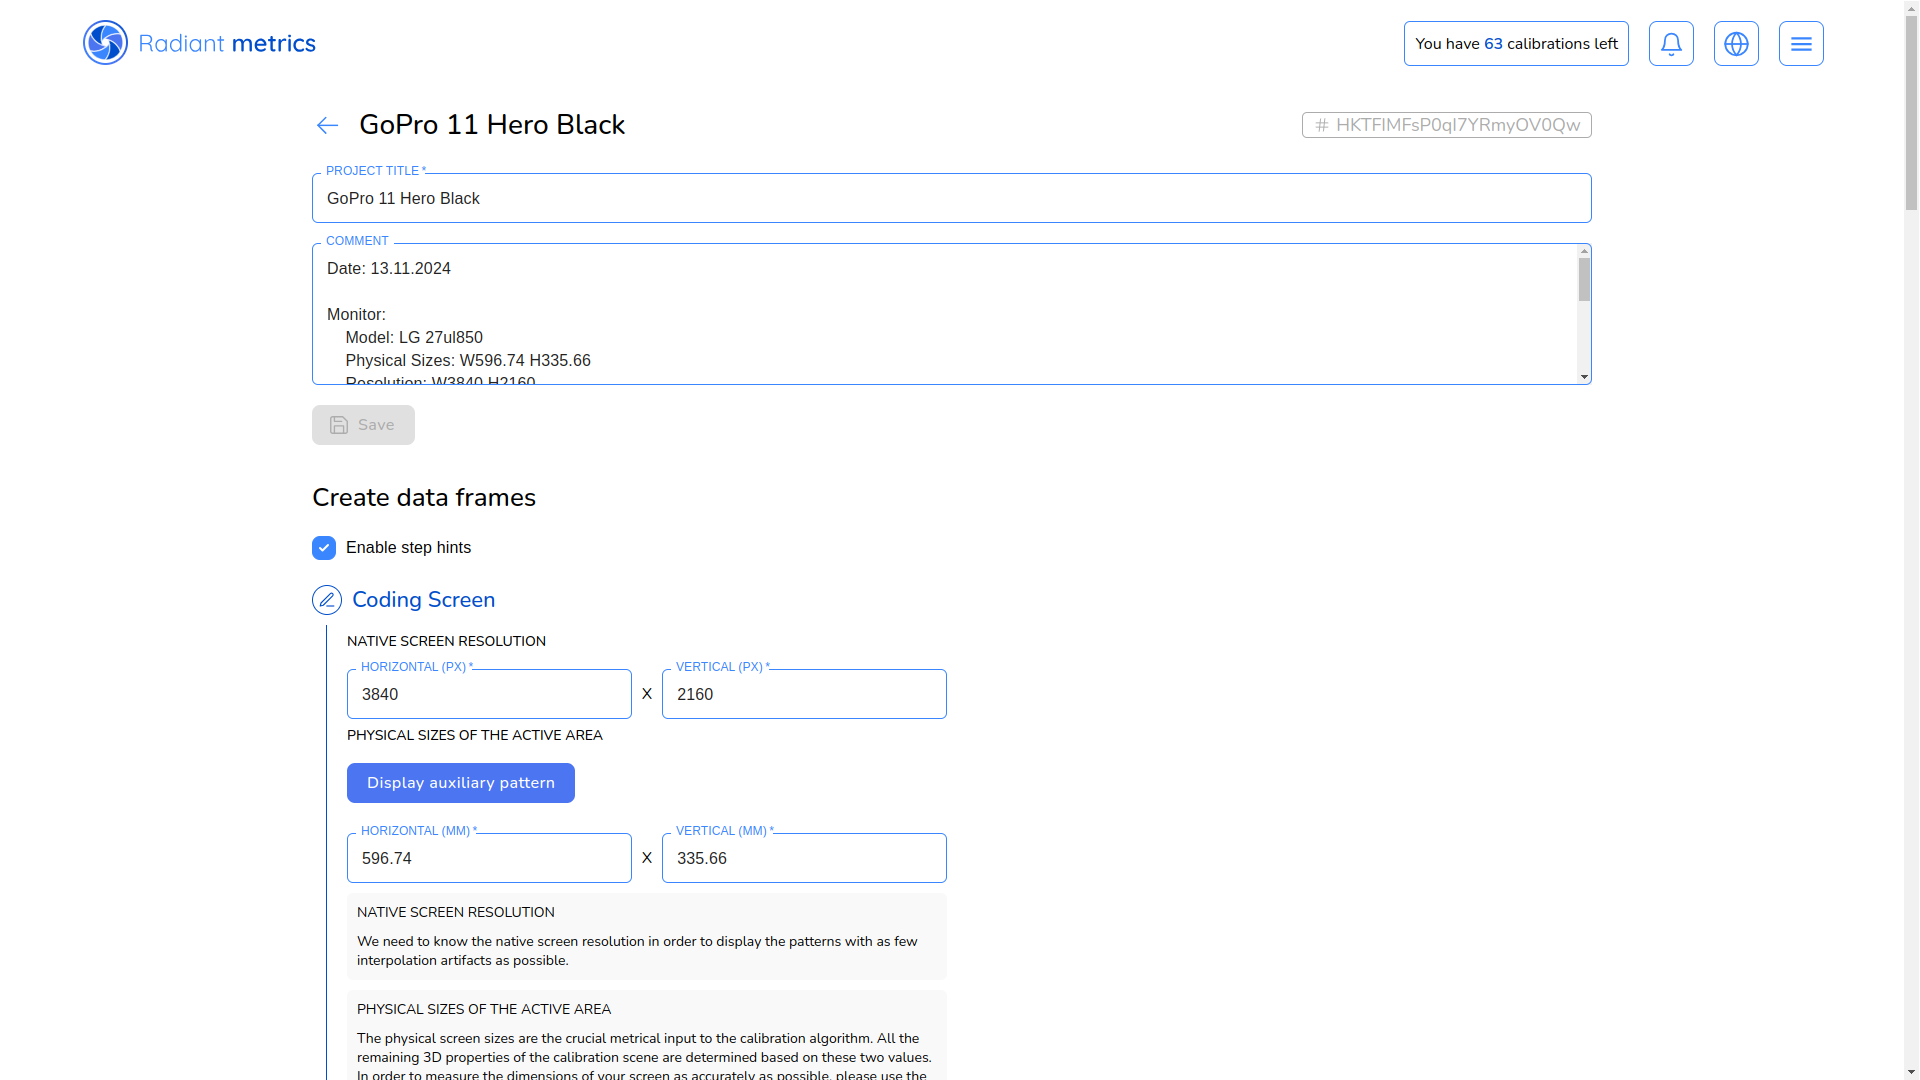
Step 1: Coding the Screen
Radiant Metrics employs active target methods, such as a flat screen—an LCD monitor with good viewing angles works perfectly.
At this step, you must enter the screen resolution in pixels and the physical dimensions of the active area in millimeters. Remember to use the native resolution and set it in the system. For the physical dimensions, refer to the monitor's specifications or measure them as accurately as possible.
A special template is available to adjust the monitor’s brightness and contrast. In most cases, the standard monitor settings yield acceptable data accuracy.
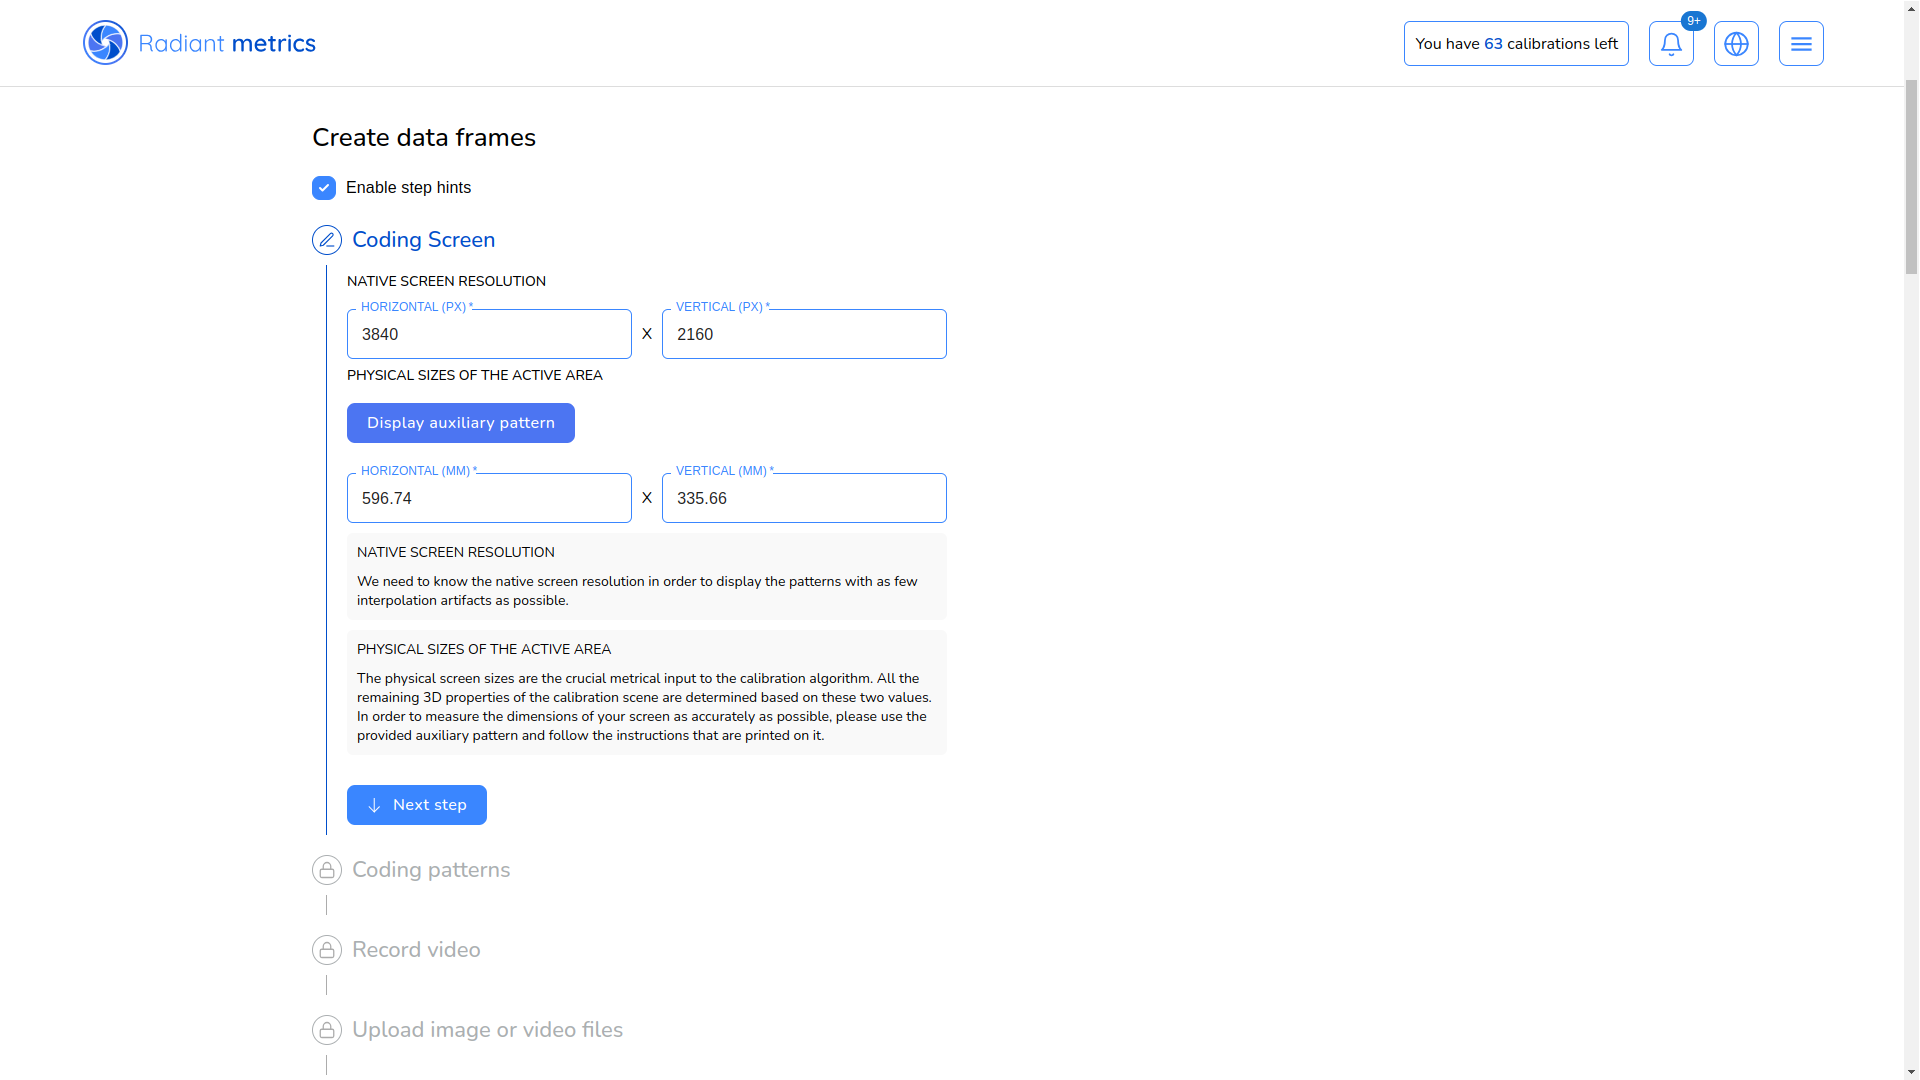
Step 2: Coding Patterns
The next step involves setting up the calibration pattern sequence. The more patterns in the sequence, the more accurate the results for each frame, improving overall calibration quality.
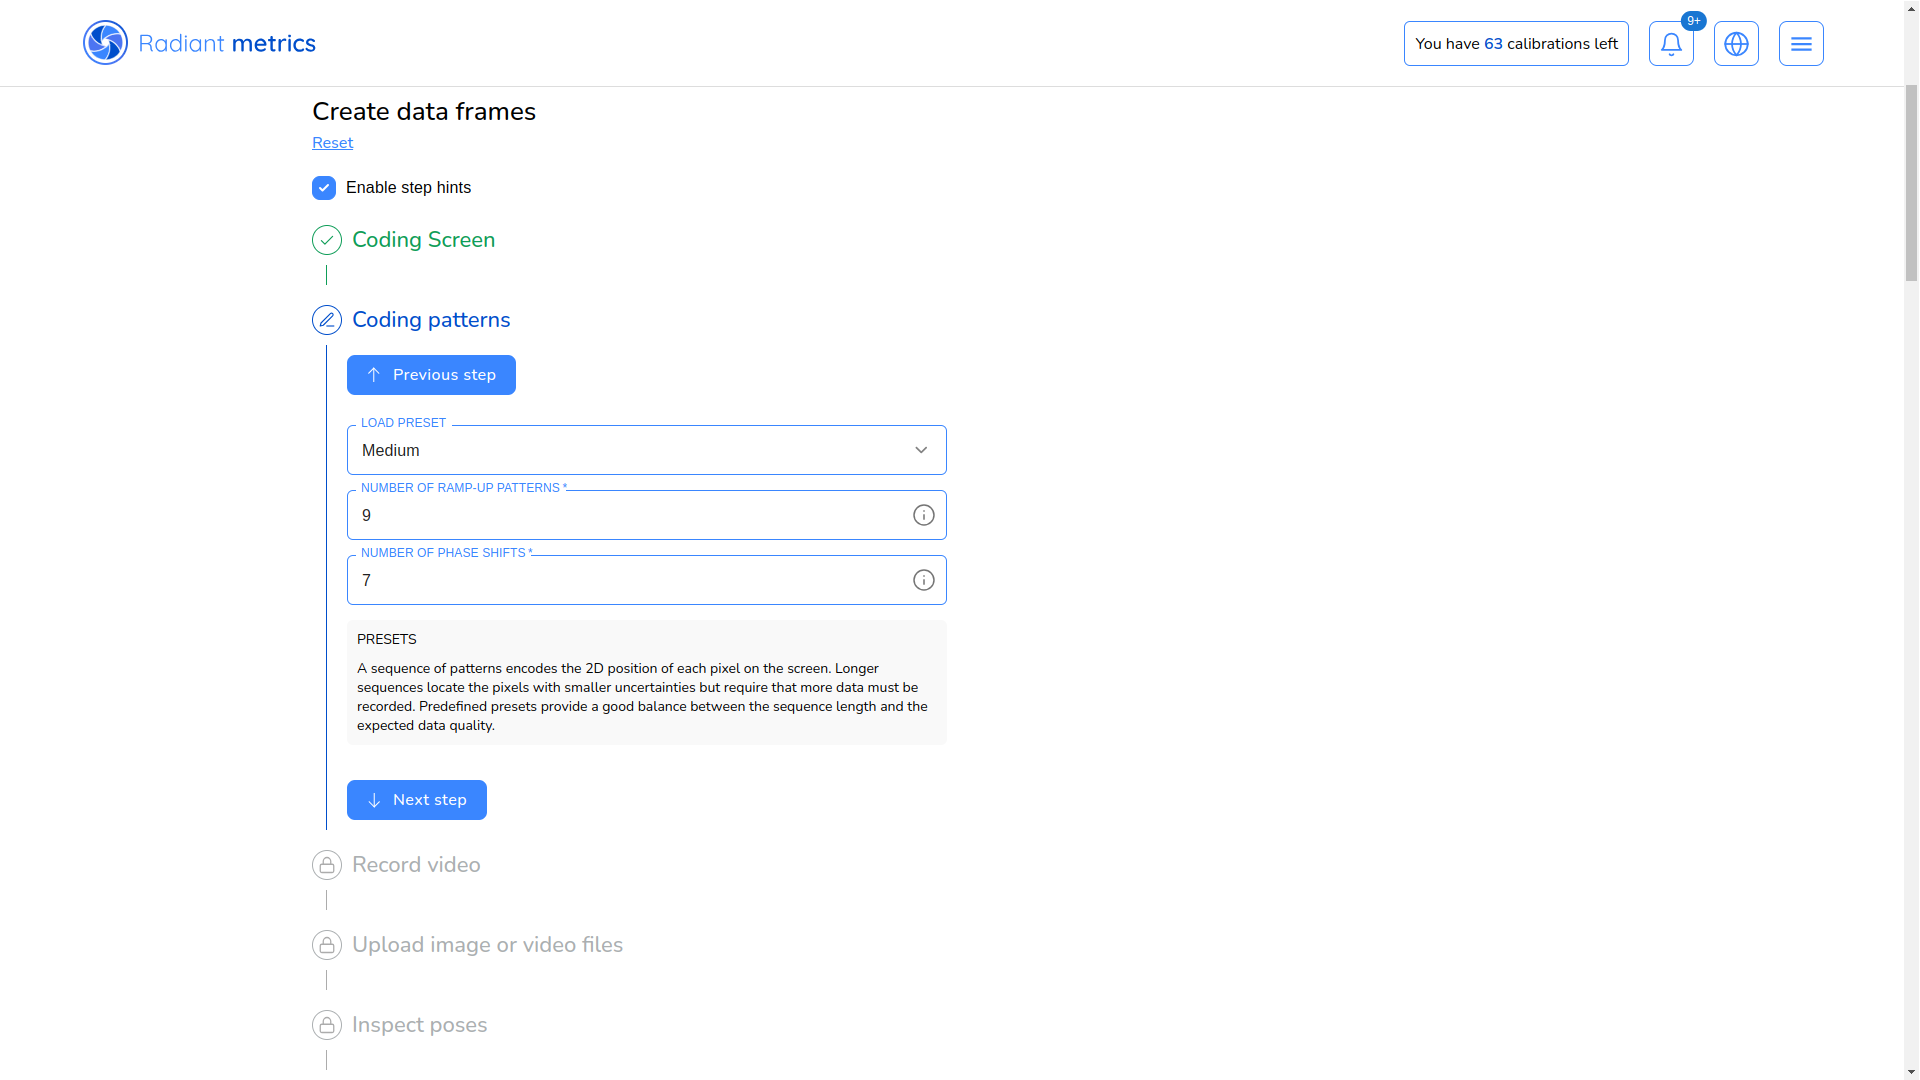
Typically, a medium preset suffices, but you can fine-tune the sequence or select another preset if needed, using the provided hints. Once the service generates the required patterns, you can move on to the video recording stage.
Step 3: Record Video
Recording the video is perhaps the most critical step in the calibration process. The service will prompt you to download the calibration patterns and then start recording.
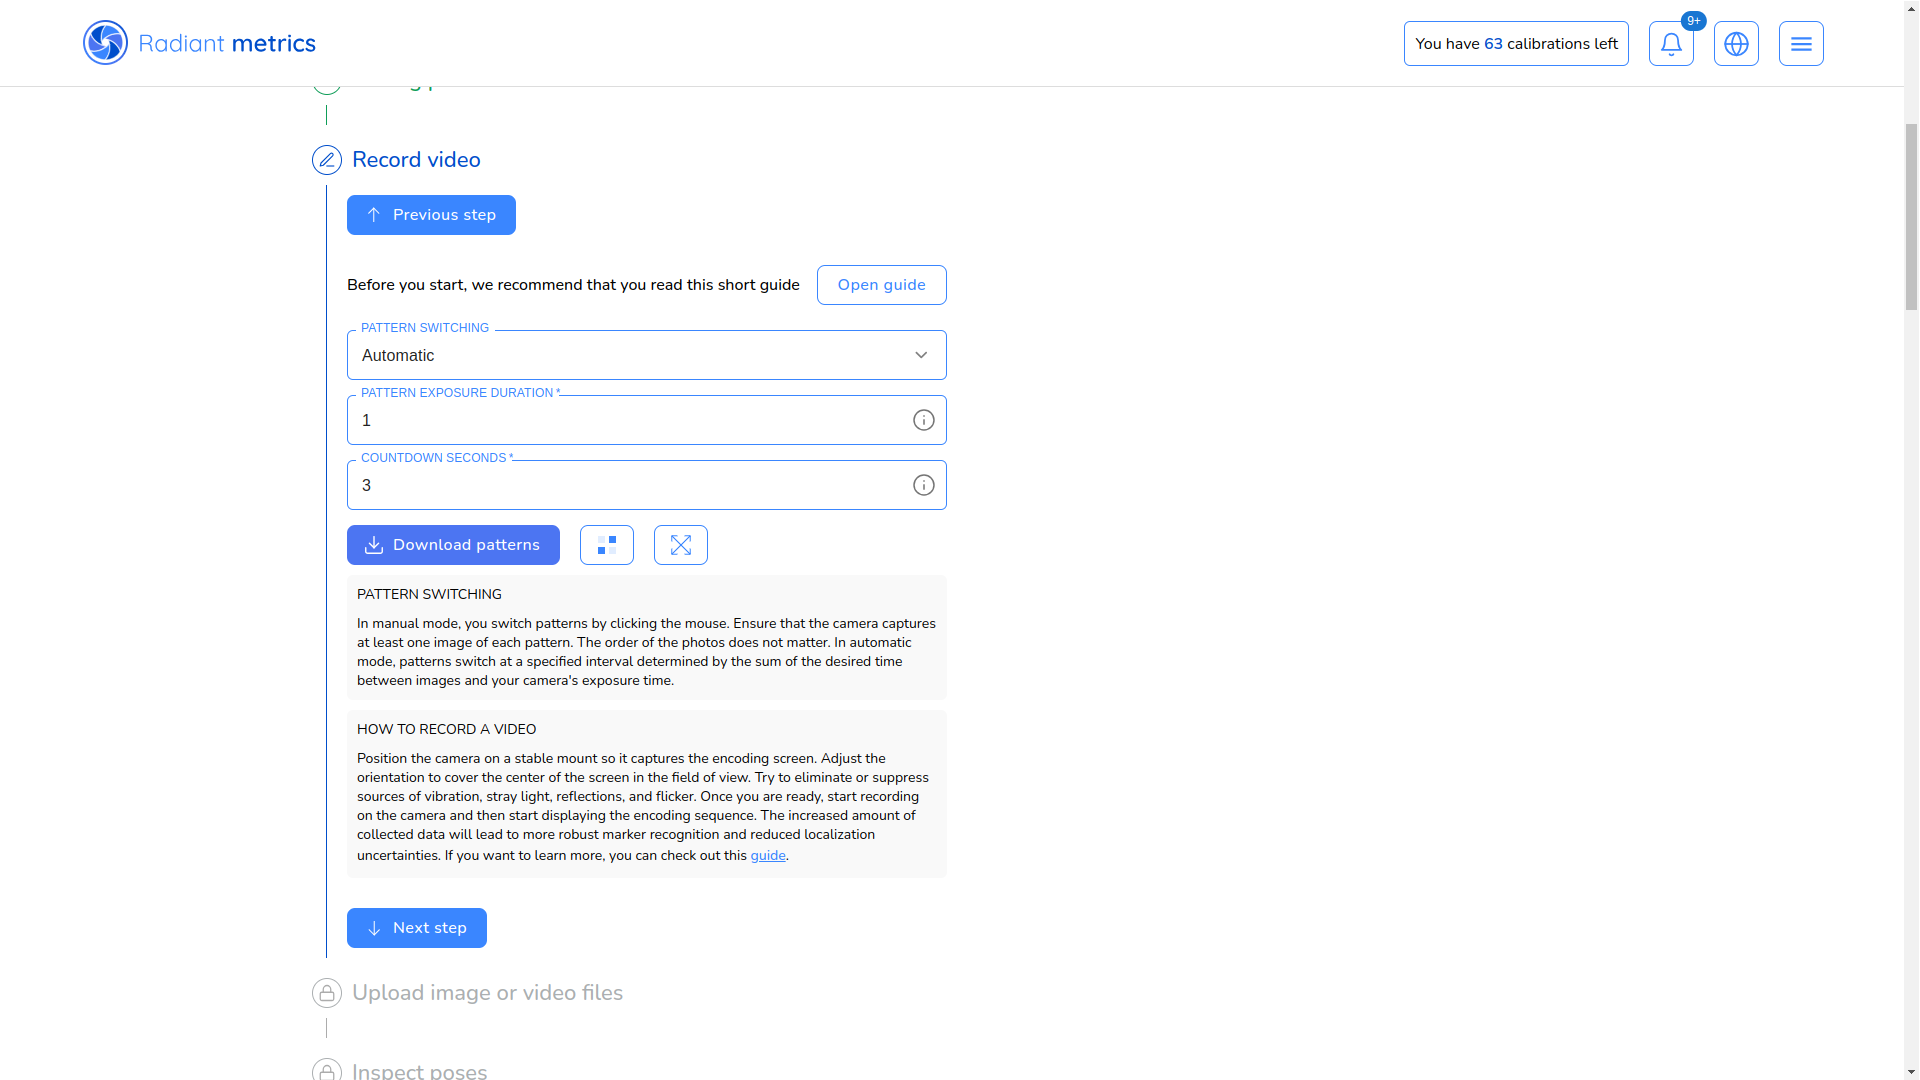
Before the slideshow begins, a QR code will appear. Scan it with your phone to control the slide playback remotely—this is convenient as it eliminates the need to use a keyboard.
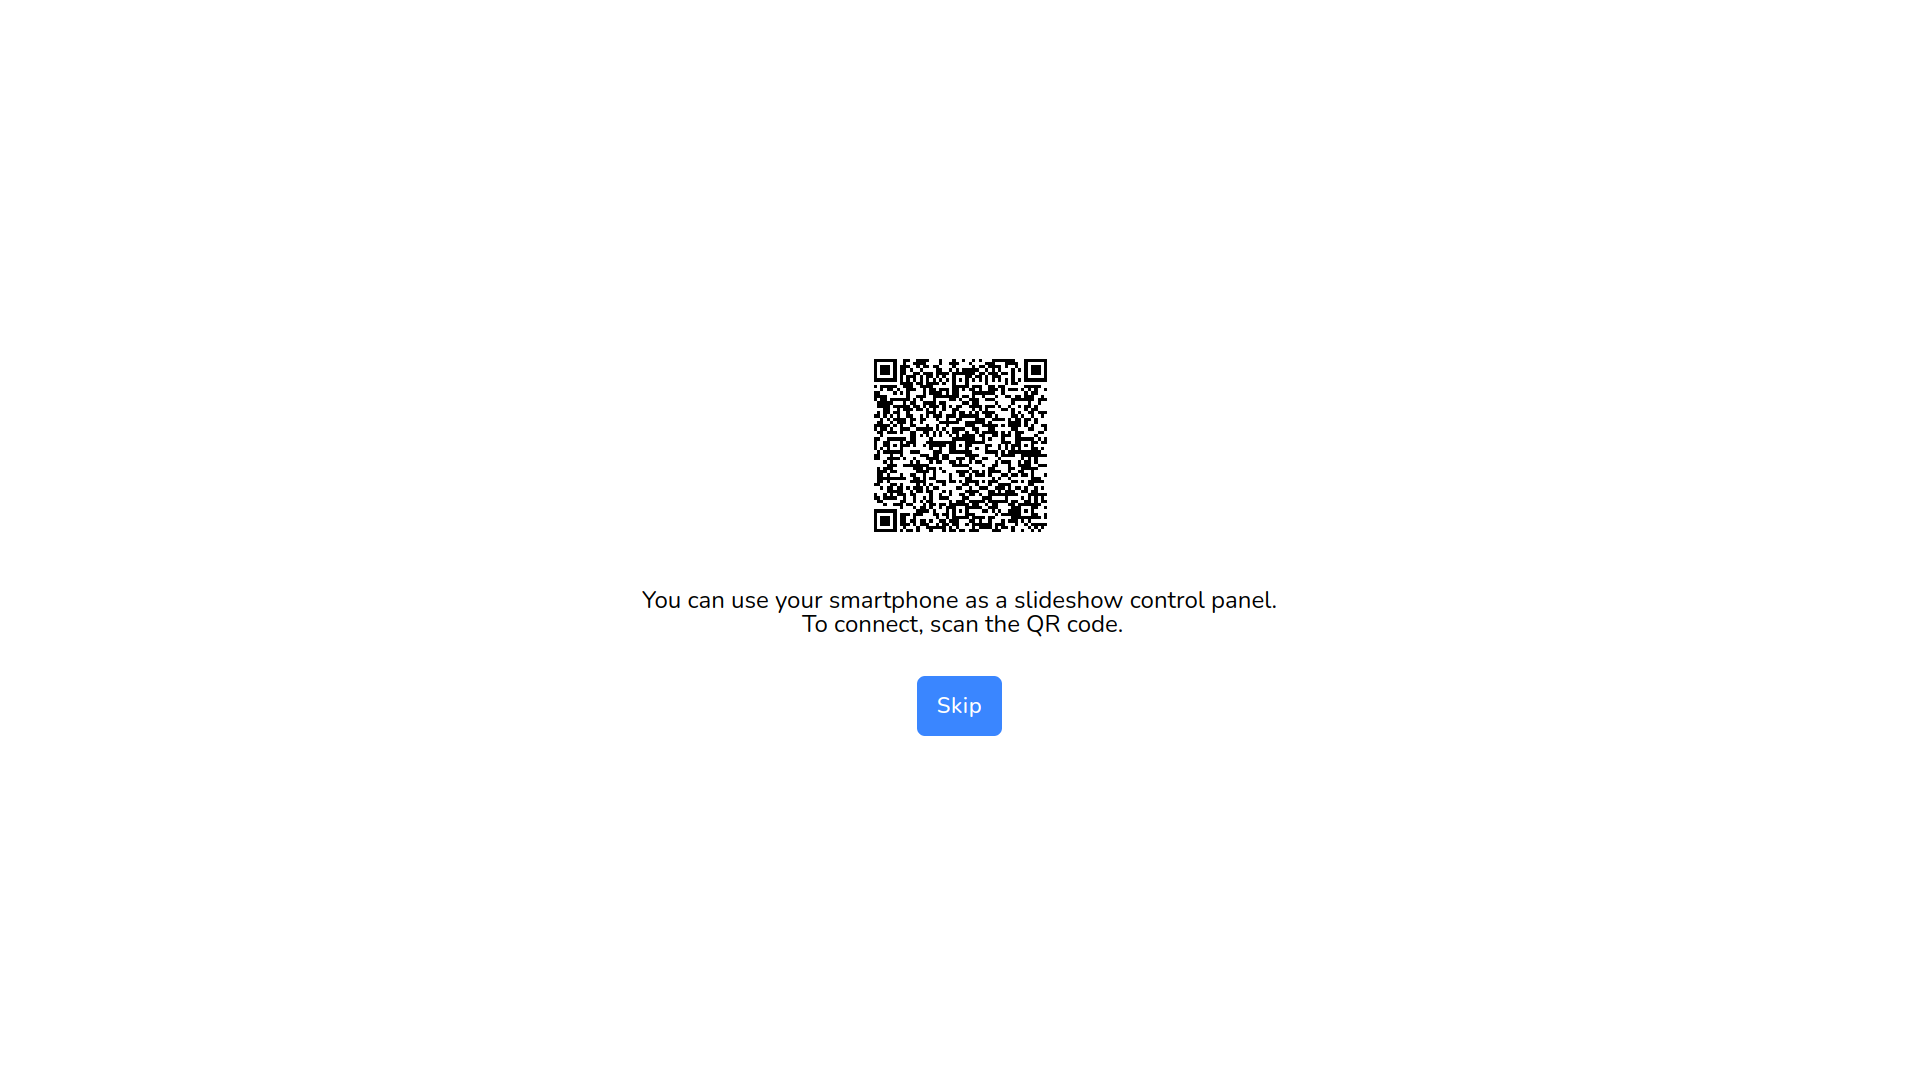
The slide sequence starts with a countdown, followed by the calibration patterns. To avoid missing patterns, it’s best to start and stop recording during the countdown. Extra frames will be ignored, but skipping a pattern will result in the video being rejected.
To better understand how the pattern sequence is displayed, check out this video:
Tips for Quality Data Collection:
Lighting: Ensure the screen is free from glare. For instance, do not place a glossy monitor opposite a window. Light reflections can render parts of the screen unusable during analysis.
Camera: Use a tripod to keep the camera stable.
Camera Settings: Adjust settings manually or let the camera’s auto mode optimize them first, then lock the settings manually. Disable any AI-based processing tools. This ensures stable imagery. Fix the focus to the same value used for the first camera position.
In fact, there are many more nuances when preparing for a shoot. I’ll cover them in detail in the upcoming article, "Lights, Camera, Action!", which will be published soon.
Step 4: Upload Image or Video Files
After recording, select the files for upload. The upload begins once you click "Next."
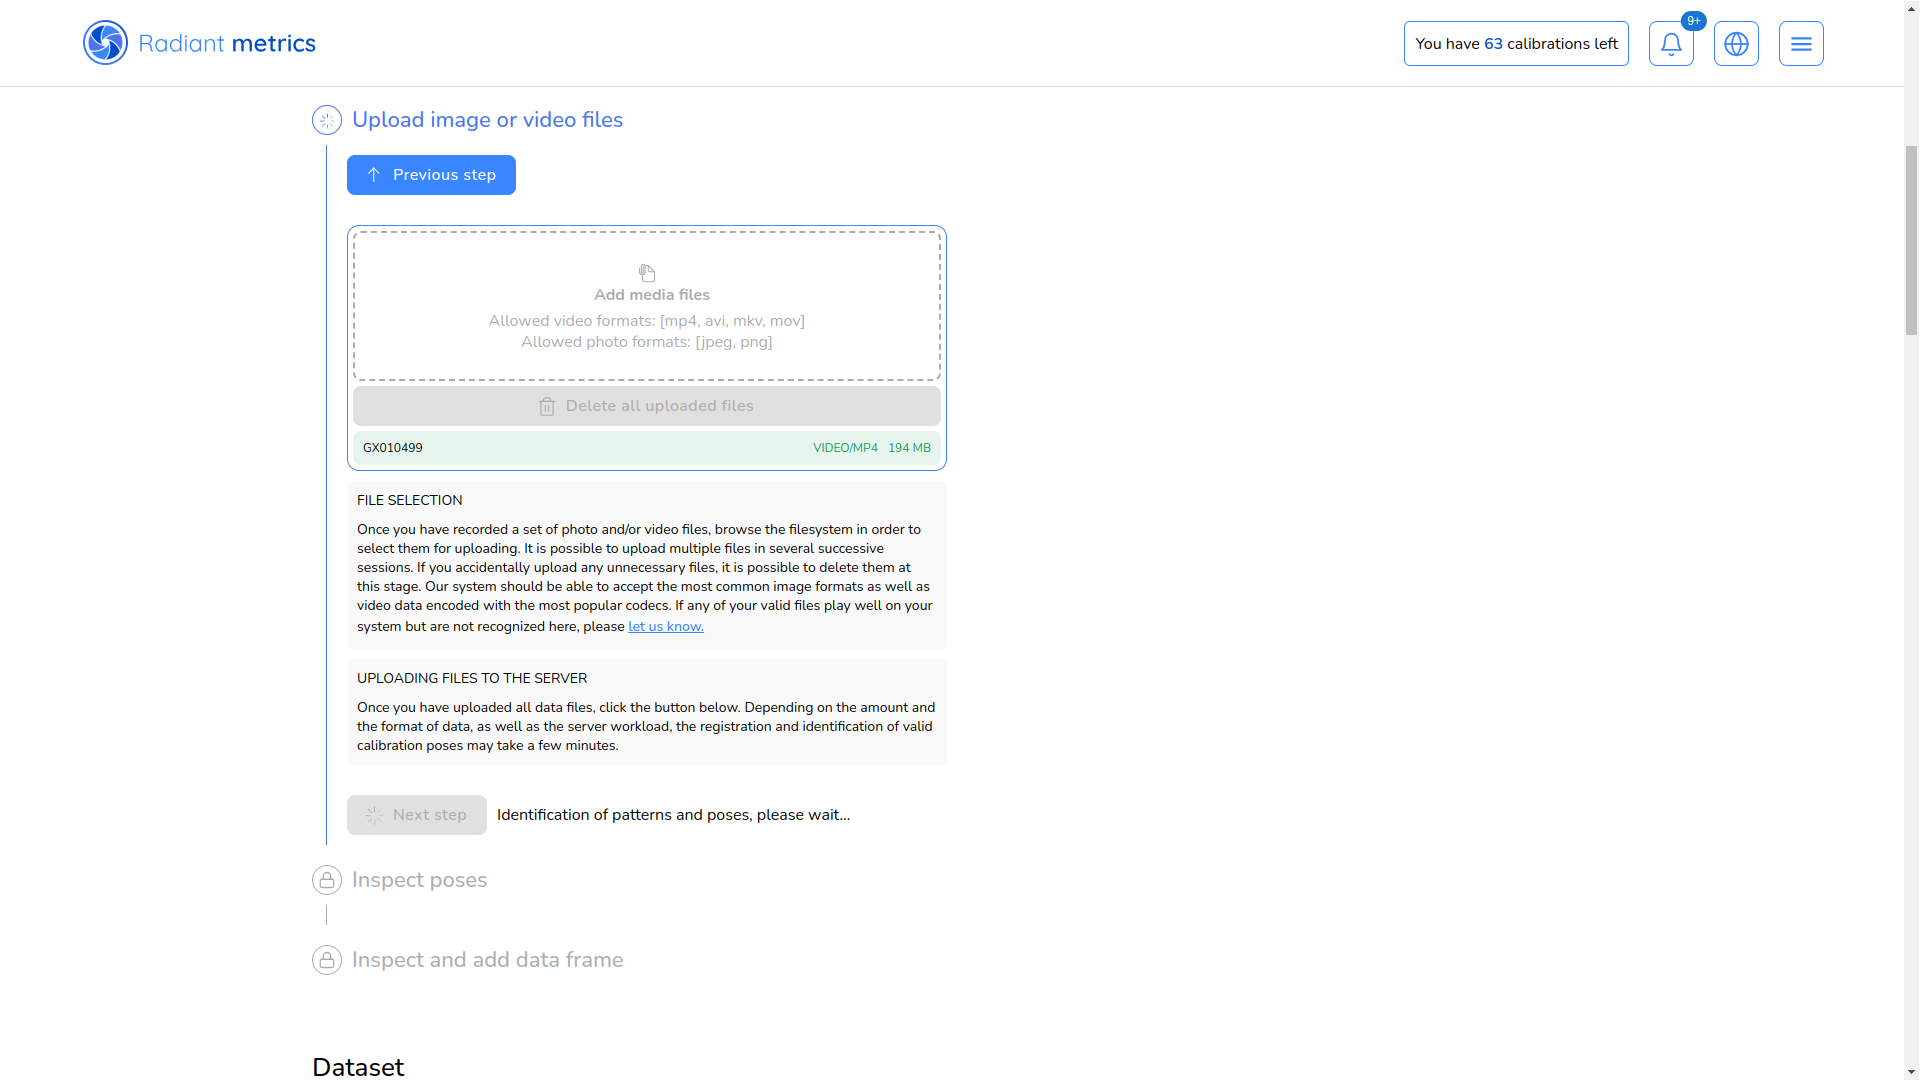
Upon completion, the files are sent for processing. Depending on the number of files and their resolution, this may take some time.
Step 5: Inspect Poses
At this stage, you can see how many camera positions the system has detected. You can delete duplicate or unsuitable files.
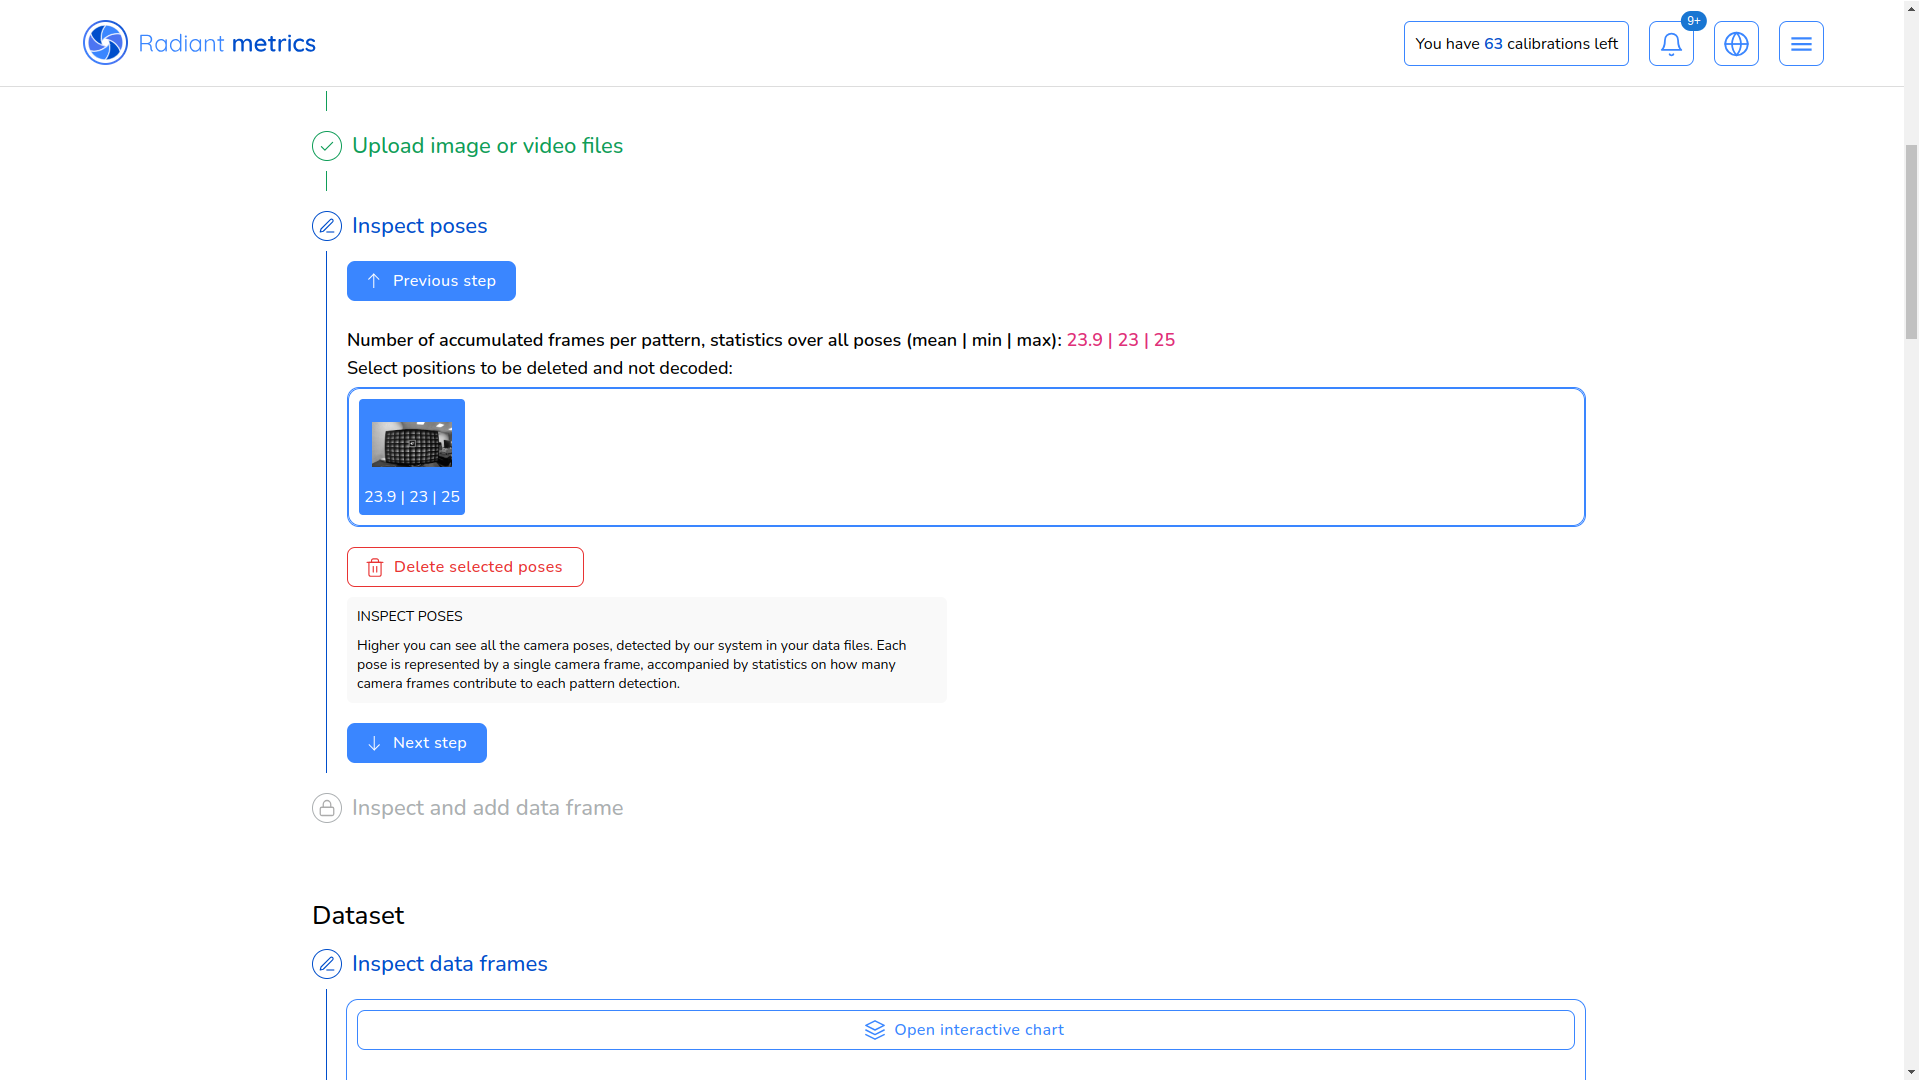
Once you click "Next," the service analyzes the files.
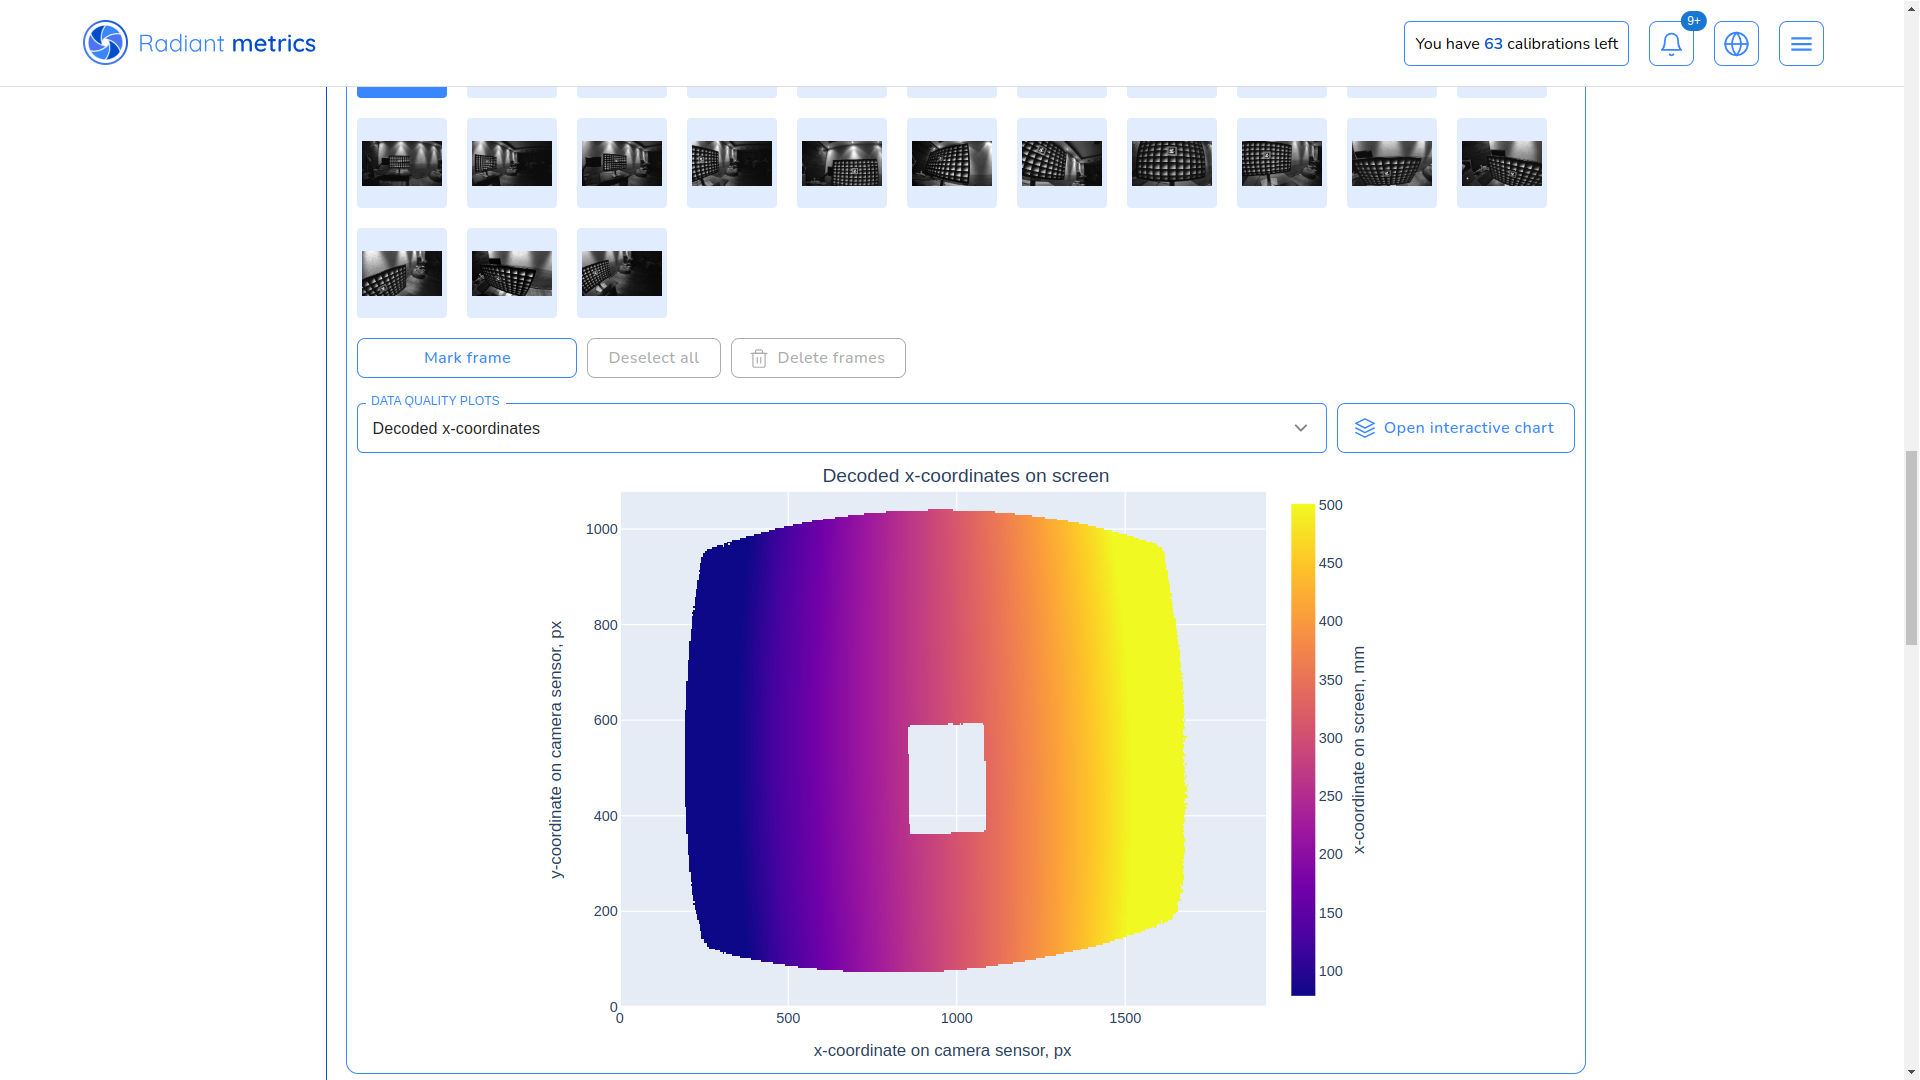
Step 6: Inspect and Add Data Frames
After analysis, the service provides an infographic. You can evaluate each frame and remove those with large gaps or significant value deviations.
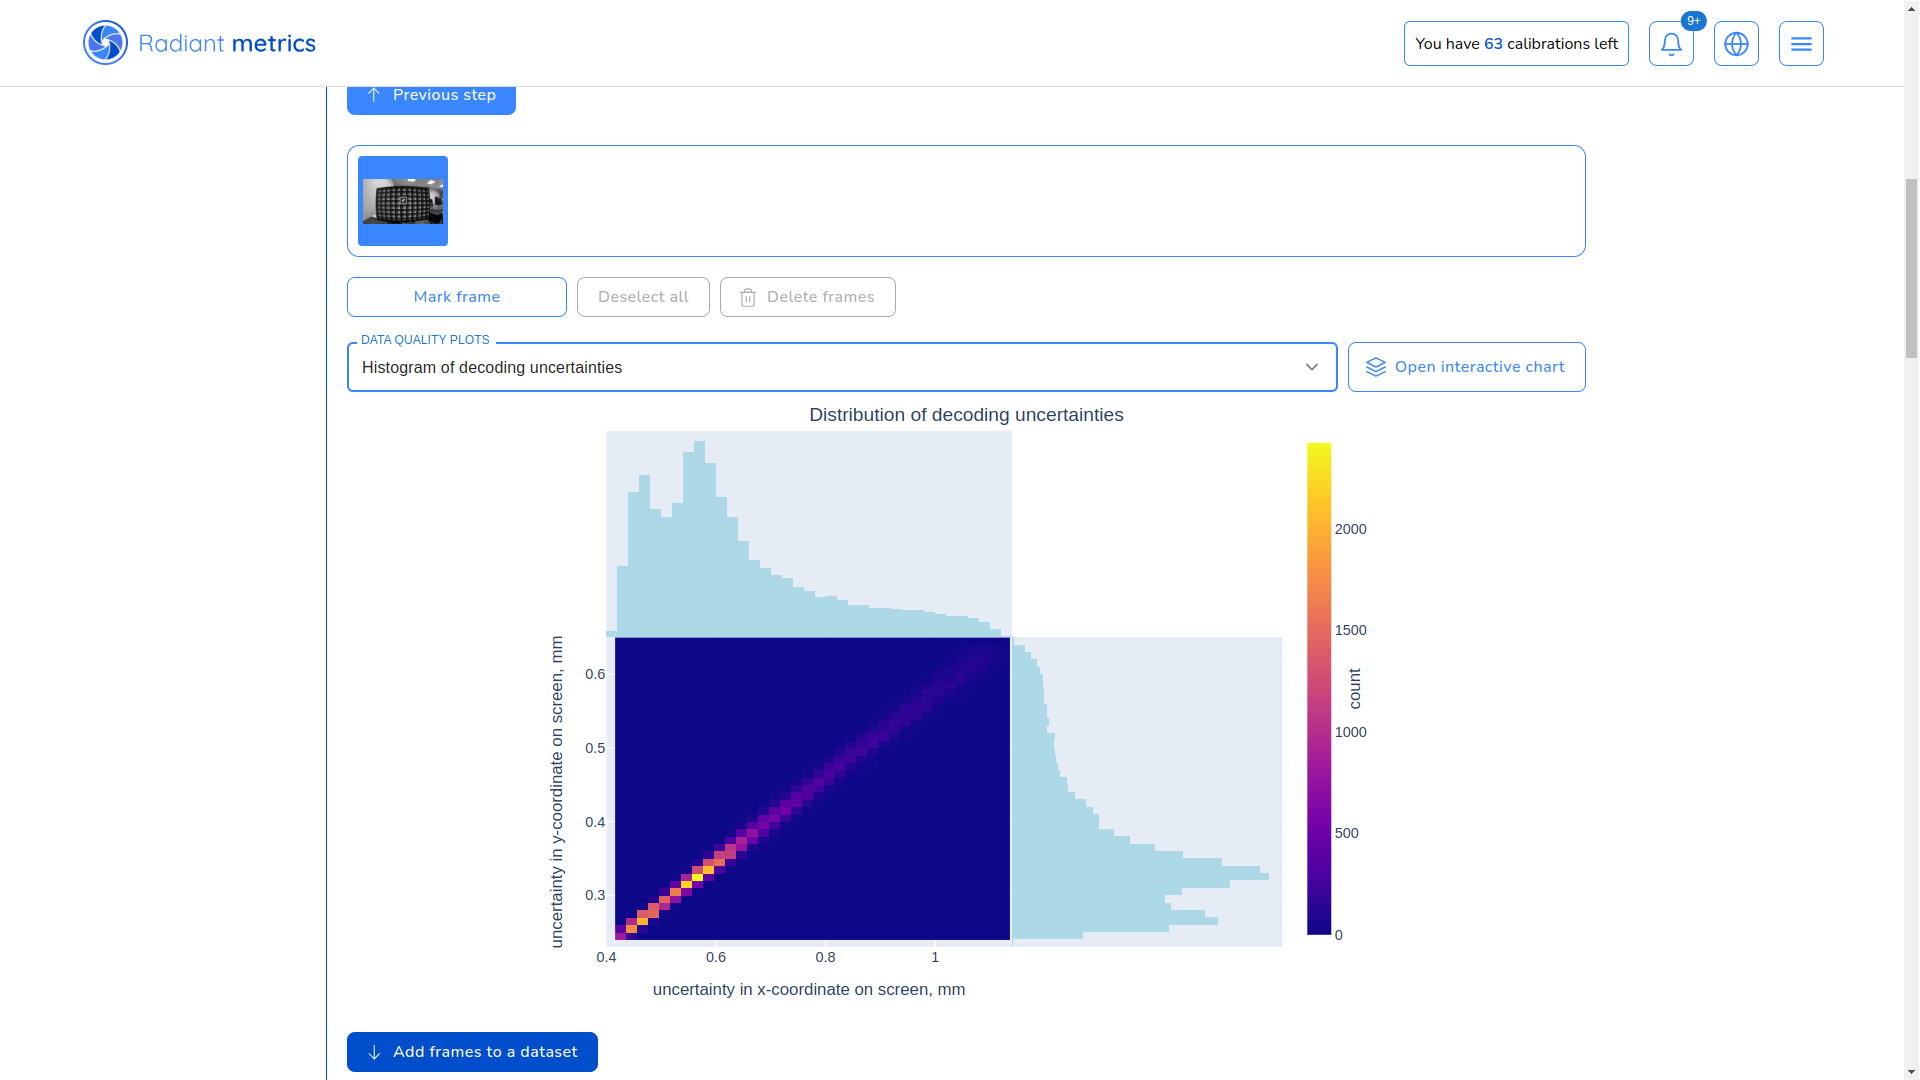
Each frame can be reviewed in full-screen mode, down to the pixel level.
Step 7: Dataset Compilation
This step compiles the frames you’ve collected.
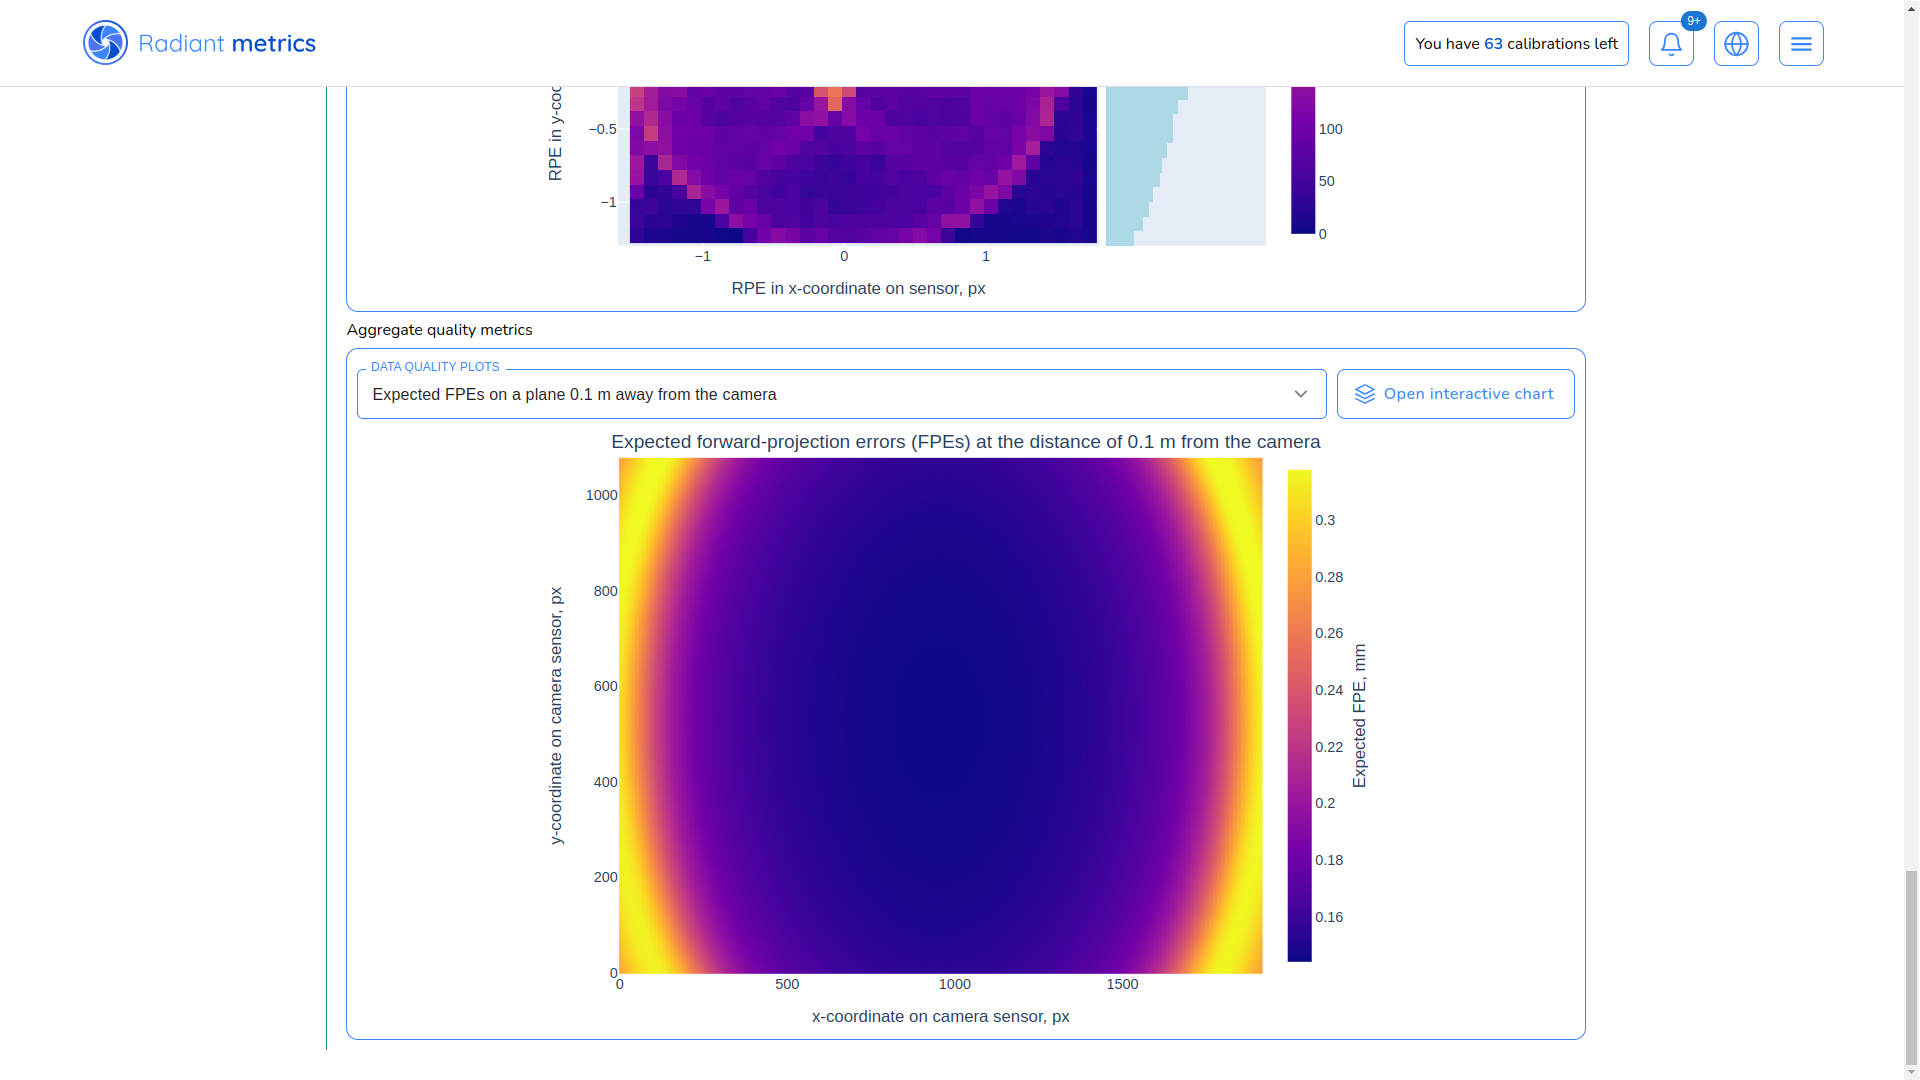
Additionally, it includes a crucial graph: the sensor coverage map, which shows how often each sensor area is covered in the frames.
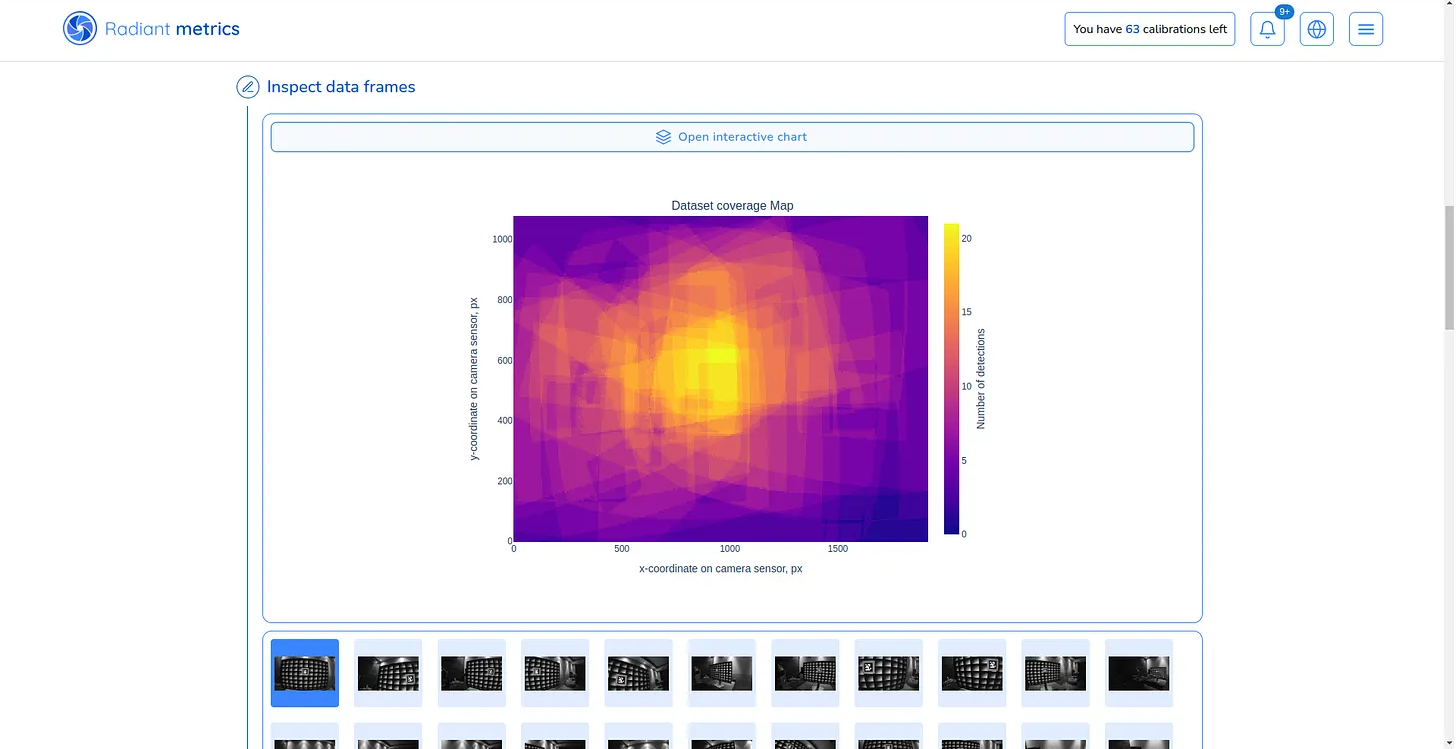
Avoid situations where the sensor edges have insufficient data or none at all.
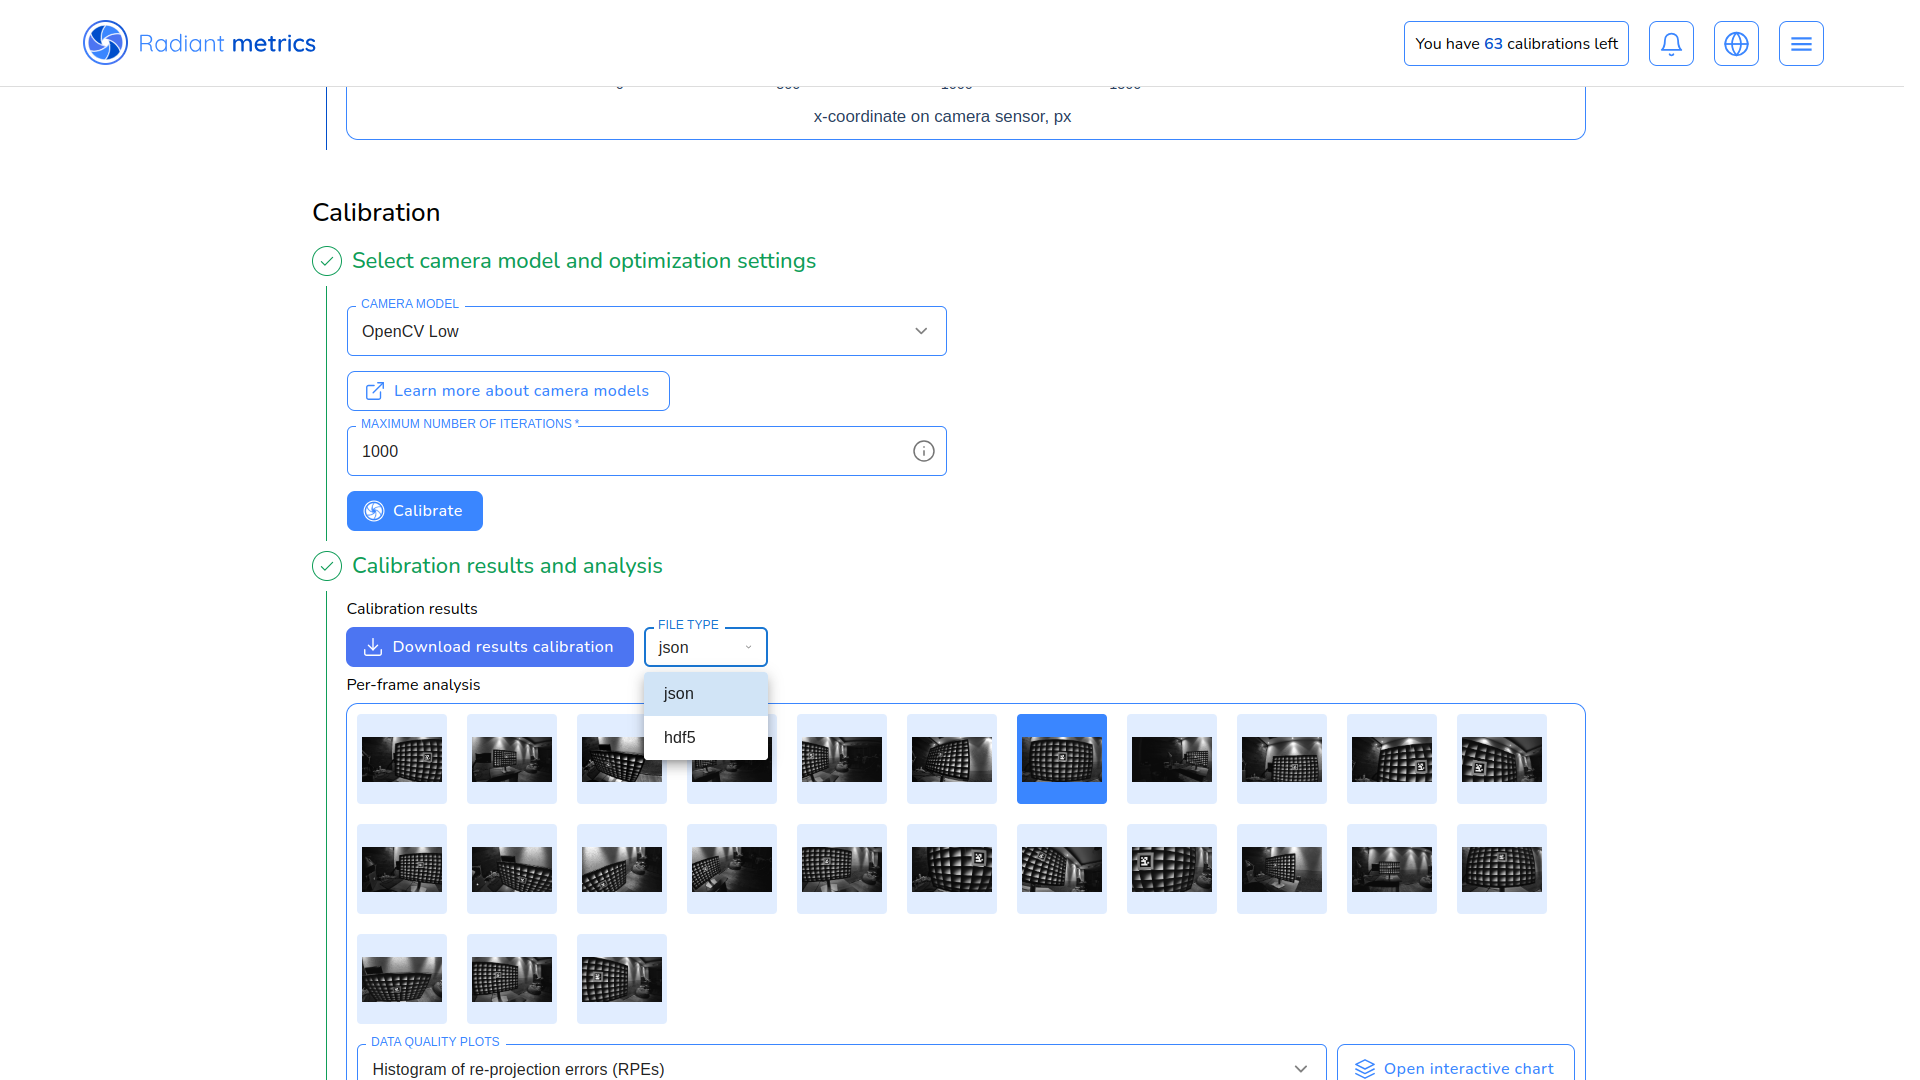
Step 8: Calibration
Finally, we arrive at the last step. To complete calibration, select the calibration model and the number of passes over your dataset. The more passes, the better the results.
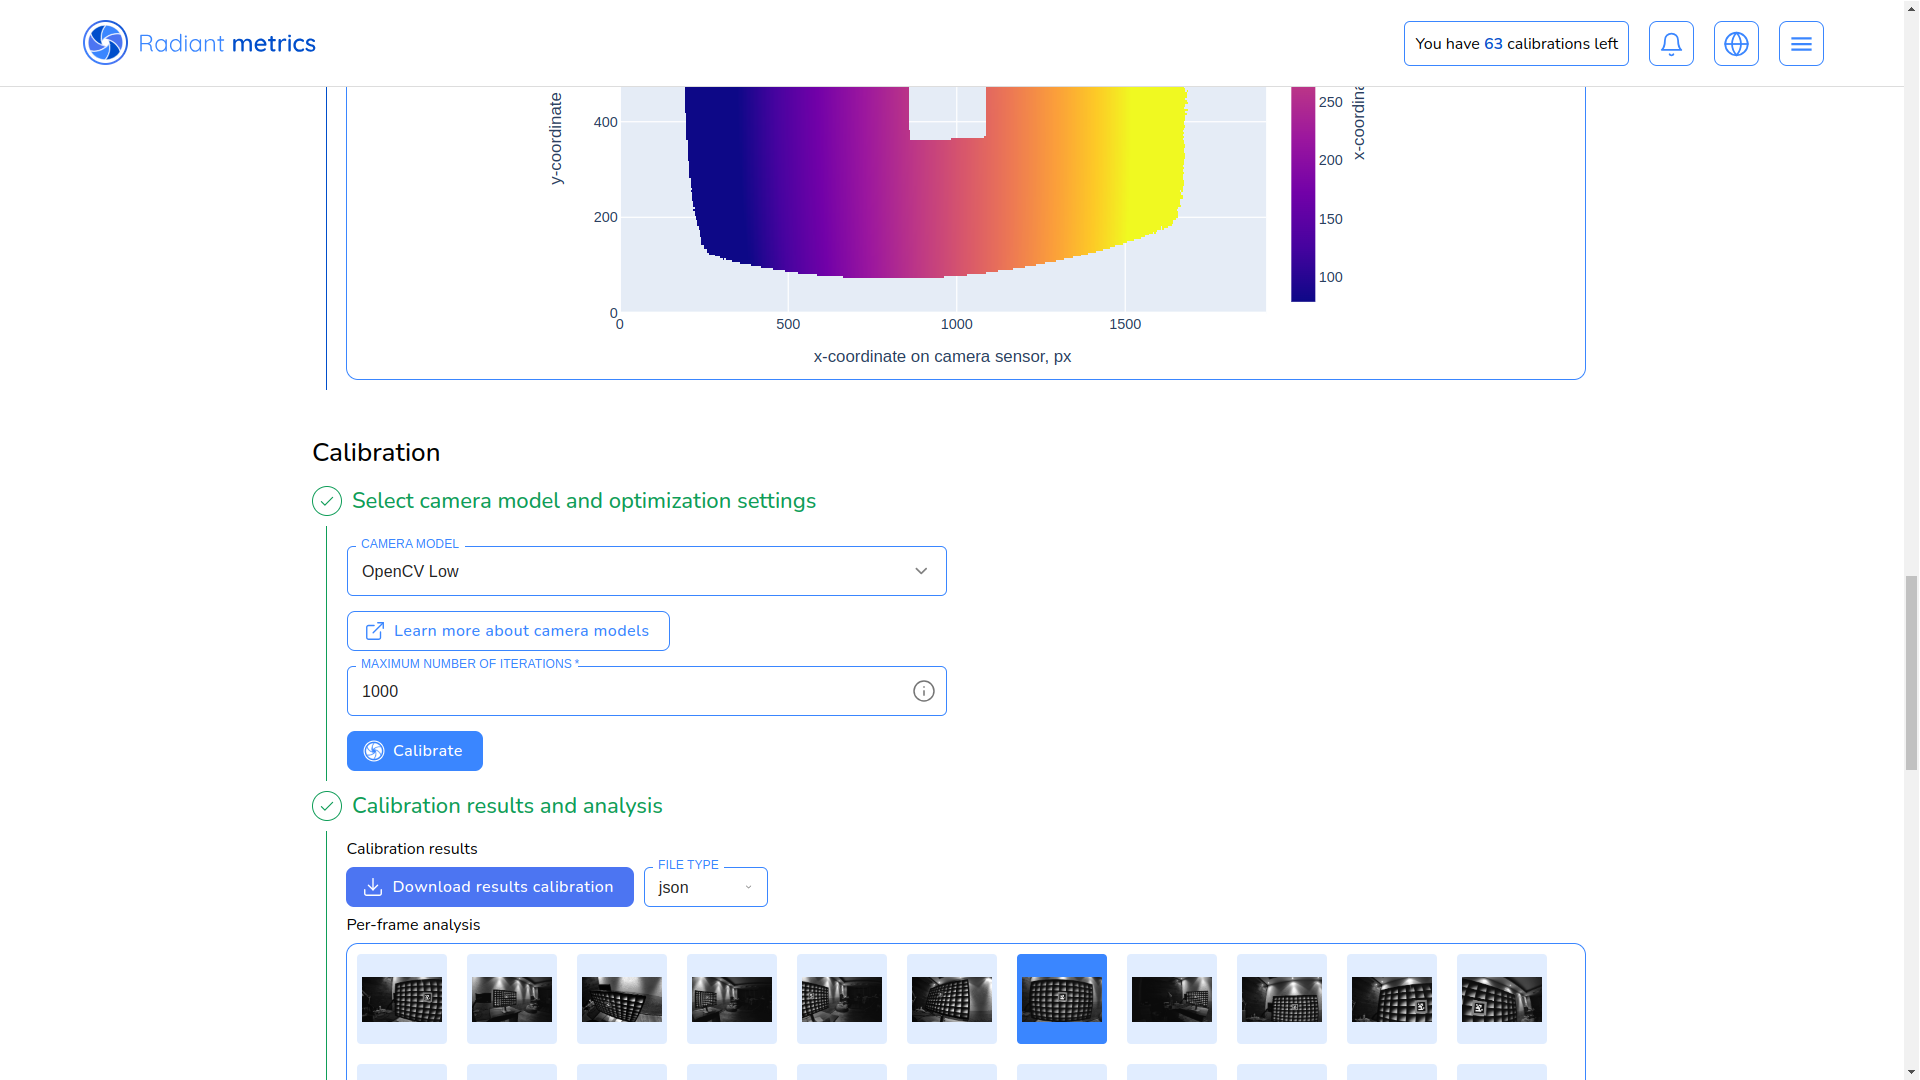
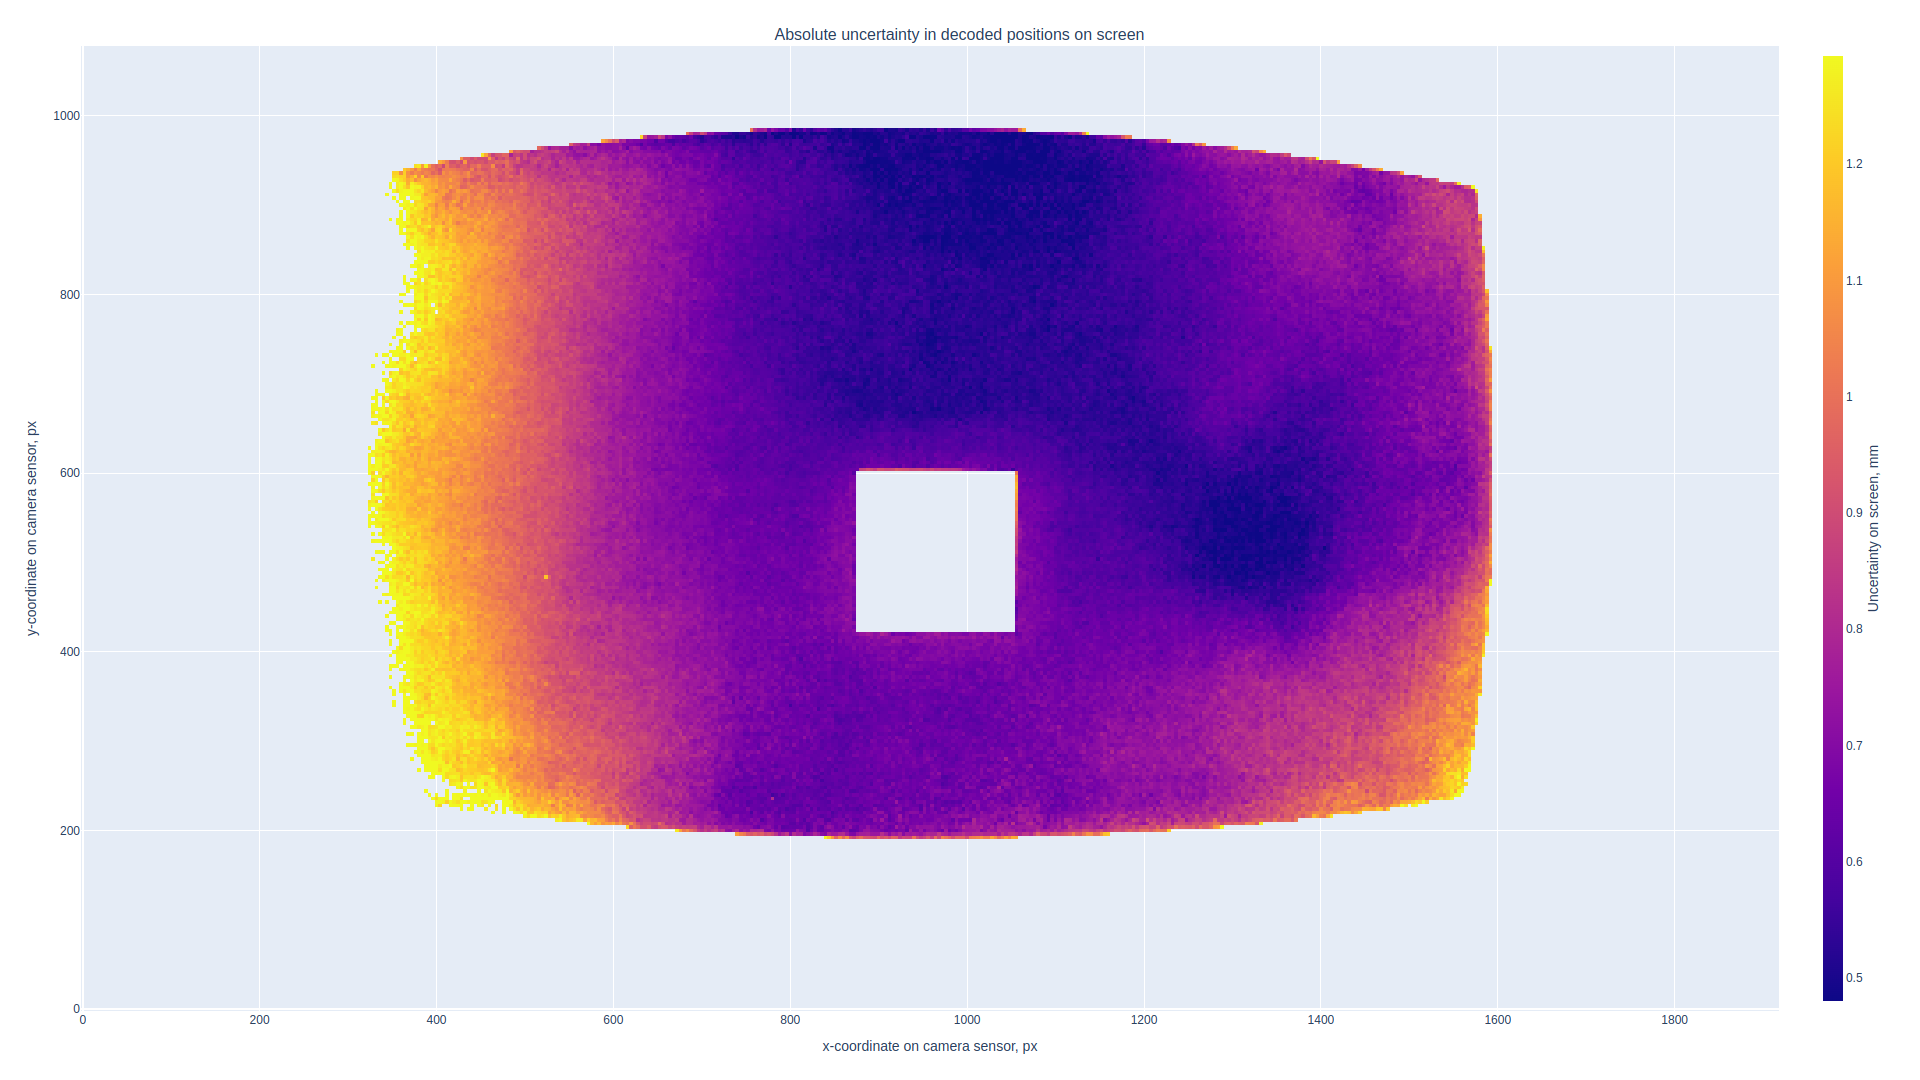
Once the calibration is complete, you will receive a report assessing the quality of each frame based on the selected camera calibration model.

This includes a summary graph of expected errors for each sensor area.
We will delve deeper into these aspects in our upcoming article, "Calibration Data: The Good and the Bad."
It’s worth noting that not every calibration model may deliver perfect results for your camera. Experiment with all available options, and if you encounter any unclear outcomes, don’t hesitate to contact support for assistance.
The results are available for download in HDF5 and JSON formats.
Have questions or want to share your experience? Contact us!